 Save
Save I first made this dessert on a rainy afternoon when I was supposed to be doing something sensible, but instead found myself mesmerized by the idea of building something that looked like stained glass from the inside out. The kaleidoscope wasn't born from a recipe hunt—it came from watching afternoon light scatter through a prism on my kitchen counter and thinking: what if dessert could do that too? Three hours later, when I pulled it from the pan and saw those jewel-toned segments catching the light, I understood why my grandmother always said the best dishes tell a story before you even taste them.
I brought this to a dinner party where everyone was recovering from a heavy meal, and I watched three people actually lean in closer when I sliced it—not out of politeness, but genuine curiosity. One guest asked if it was too pretty to eat, then immediately did, and came back for seconds. That's when I realized this dessert works because it gives people permission to be delighted by food again, to pay attention to colors and shapes and the little surprises hidden in each bite.
Ingredients
- Whole milk and heavy cream (200 ml each): These create the silky base that carries flavor without feeling heavy—the cream adds richness while the milk keeps it light enough to taste the fruit.
- Granulated sugar (100 g): Dissolved gently into warm cream, this sweetens the custard layer without crystallizing, which would dull that jewel-like clarity you're after.
- Powdered gelatin or sheets (3 tsp or 6 sheets): The backbone of the whole thing—bloomed first in cold water to activate, then dissolved into warmth so it sets into silky layers rather than rubber.
- Vanilla extract (1 tsp): A whisper of vanilla that doesn't fight with the fruit, just softens the edges of sweetness.
- Fruit purees (5 tbsp total, mixed colors): Raspberry, mango, kiwi, blueberry, and blackberry give you both flavor and that unmistakable visual punch—fresh or frozen purees both work beautifully.
- Food coloring (gel or liquid): Just a drop or two—gel tends to be more forgiving than liquid and won't thin out your mixture.
- Digestive biscuits or graham crackers (150 g): Crushed fine and pressed with melted butter, this creates a tender base that won't shatter when you slice.
- Unsalted butter (60 g, melted): The binding agent for your crumb base—use good butter here because you'll taste it.
Tired of Takeout? 🥡
Get 10 meals you can make faster than delivery arrives. Seriously.
One email. No spam. Unsubscribe anytime.
Instructions
- Make the foundation:
- Crush your biscuits into fine crumbs—not powder, but nothing chunky either. Mix with warm melted butter until it feels like wet sand, then press it firmly into your springform pan lined with parchment paper. Chill it while you work on the layers; this keeps it stable when you pour warm liquid on top.
- Bloom the gelatin:
- Sprinkle your gelatin over cold water and let it sit undisturbed for five minutes—it'll absorb the water and soften. If using sheets, lay them flat in cold water instead, then gently squeeze out the excess before using.
- Build the custard base:
- Heat your milk, cream, and sugar together over medium heat, stirring occasionally until the sugar dissolves and steam rises—you want it hot but not boiling, or you'll cook off delicate flavors. Pour it over your bloomed gelatin and stir for a minute until it's completely smooth and dissolved, then add your vanilla and mix through.
- Divide and color:
- Split your warm mixture into five bowls, about 100 ml each. Add a different fruit puree to each bowl along with a drop or two of matching food coloring—stir gently so the colors swirl without becoming muddy. If a color feels too pale, add another tiny drop, but restraint usually wins.
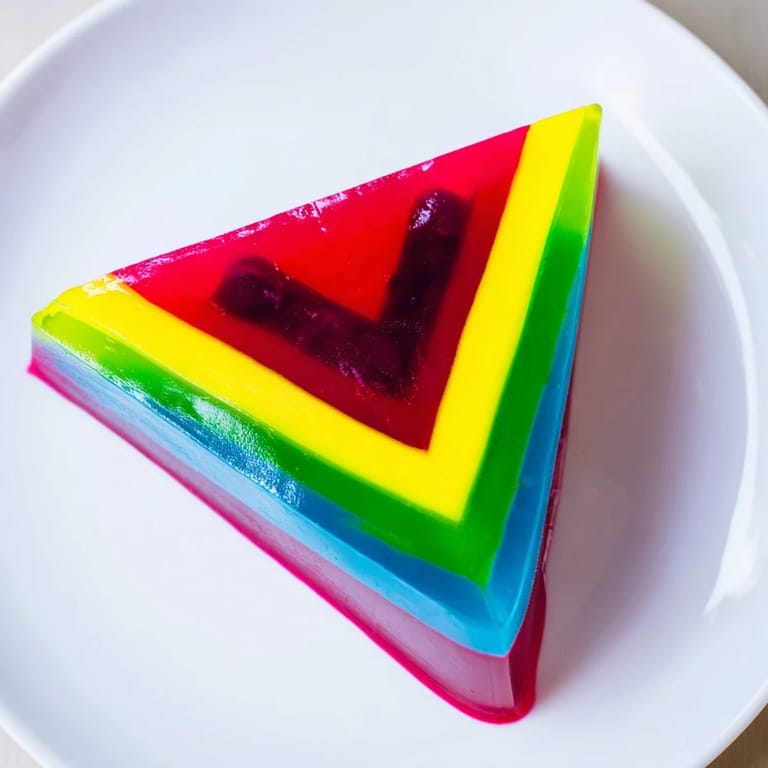
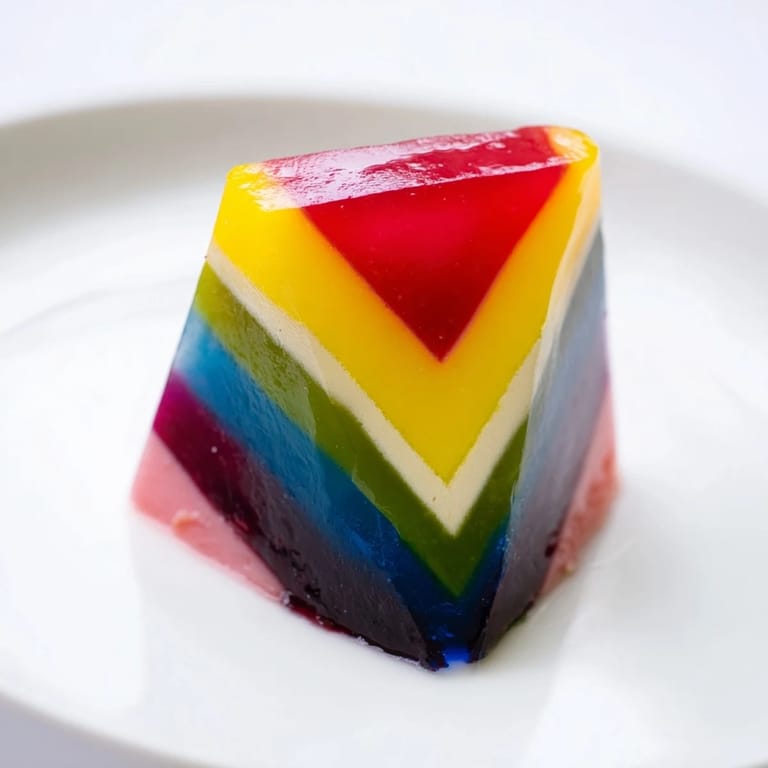
- Create the V-segments:
- This is where aluminum foil dividers come in—fold them into V-shapes and arrange them in your springform pan to create five wedge sections. Pour each colored mixture into its own section, working slowly so the colors stay distinct. Let this chill for 30 minutes, then carefully remove the dividers—the layers will hold their shape.
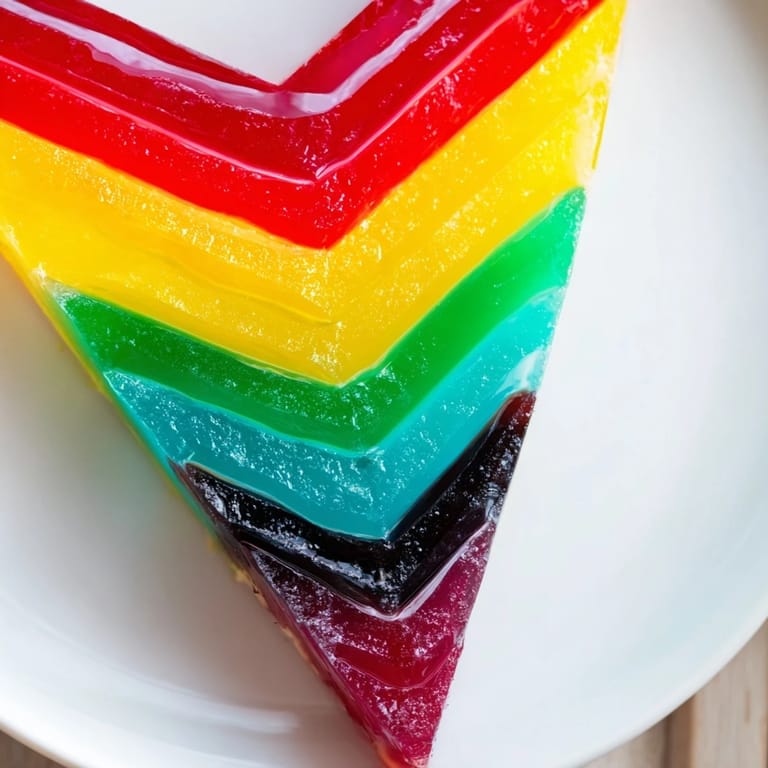
- Set and slice:
- Give the whole pan another 2 to 3 hours in the fridge so every layer becomes completely firm and silky. Run a warm knife around the edge, release the springform, and slice through—you'll see the kaleidoscope reveal itself.
 Save
Save I learned the importance of patience with this dessert the hard way—I once skipped the intermediate chill and tried to remove the dividers too early, and the whole thing collapsed into a beautiful but formless puddle. Now I treat the resting time like part of the recipe itself, which somehow makes the moment of slicing feel even more rewarding.
Why the Springform Pan Matters
A springform releases cleanly without you having to flip or wrestle with the dessert, which is crucial when you've built something this delicate. The sides come off and you're left with a pristine cake ready to show off, not something that's been manhandled into shape.
Customizing Your Kaleidoscope
This dessert is less a prescription and more a playground—you can use any fruit purees and colors that speak to you, whether that's pastels for a baby shower or jewel tones for something more dramatic. I've made versions with passion fruit and tangerine, and once with all berry variations where the colors were so close they blended into a sunset effect, which was its own kind of beautiful.
Serving and Storage Wisdom
A slice of this looks stunning on its own, but a tiny dollop of whipped cream or a handful of fresh berries nearby adds texture and cuts through the sweetness perfectly. It keeps covered in the fridge for up to four days, though the texture stays silkiest in the first two, and it actually travels well if you leave it in the springform until you're ready to serve.
- Let it sit out for five minutes before slicing so the knife glides through without cracking the layers.
- A warm, damp knife between each slice keeps the colors clean and prevents dragging.
- If you're making this ahead for an event, assemble everything except the final chilling the night before.
 Save
Save Making this dessert feels like creating something that transcends the kitchen—it's art and flavor and the gentle pleasure of taking time with food. Serve it to people who pay attention to beauty, and watch their faces light up when they understand what they're looking at.
Recipe Help
- → How do I achieve the vibrant colors in each layer?
Use gel or liquid food coloring matched with your fruit purees. Adding both helps intensify the hues in each layer.
- → What is the purpose of using gelatin in the layers?
Gelatin helps the creamy mixtures set firmly while maintaining a smooth, delicate texture for clean slicing.
- → Can I prepare this dessert ahead of time?
Yes, the dessert requires chilling for several hours to fully set and can be made in advance for convenience.
- → How do the V-shaped segments form their distinct pattern?
Using foil or cardboard dividers in the pan divides the layers into V-shaped sections, creating a striking visual effect when removed.
- → Are there suitable substitutions for gelatin for dietary restrictions?
Agar-agar can replace gelatin for vegan options, combined with coconut milk and cream to replicate the texture.
- → What are recommended serving suggestions?
Serve chilled, optionally accompanied by fresh fruit or a dollop of whipped cream to complement the flavors.